
ในโปรเจคนี้เราจะใช้ฟังก์ชั่น Serial Bluetooth ใน ESP32 ใน ESP32 เพื่อจับคู่กับสมาร์ทโฟนและใช้แอพ Bluetooth Control for Arduino ที่มีอยู่ใน Play store เพื่อส่งคำสั่งไปยัง ESP32 เพื่อควบคุมเปิดปิด LED โดยใช้สมาร์ทโฟน

### อุปกรณ์ที่ใช้ ###
1. PICO KIT V4 ESP32 Development Board WiFi + Bluetooth
2. Micro USB Cable Wire 1m for NodeMCU
3. Breadboard 830 Point MB-102
4. Traffic Light LED Display Module
5. Jumper (M2M) 10cm Male to Male
โดยการทำโปรเจคมีขั้นตอนดังนี้
1.ติดตั้ง Arduino core for ESP32
ลิงค์การติดตั้ง Arduino core for ESP32
https://robotsiam.blogspot.com/2017/09/arduino-core-for-esp32.html
2.เชื่อมต่ออุปกรณ์
2.1 เชื่อมต่อ ESP32 กับ Traffic Light LED Display Module

ภาพรวมการต่อวงจร

3. อัพโหลดโปรแกรม
3.1 เชื่อมต่อสาย USB ระหว่าง คอมพิวเตอร์ กับ ESP32

3.2 ตรวจสอบการติดตั้งไดร์เวอร์ ของ ชิปแปลง USB to UART เบอร์ CP2102 โดย คลิกขวา Computet -> Properties -> Device Manager
ที่ Ports (COM & LPT) จะพบ ไดร์เวอร์ ของชิป CP2102
ในตัวอย่างเป็น Silicon Labs CP210x USB to UART Bridge (COM18)

3.3 เปิดโปรแกรม Arduino (IDE) และ ก็อปปี้ โค้ดด้านล่างนี้ ไปวางไว้ในส่วนเขียนโปรแกรม
#include "BluetoothSerial.h"

BluetoothSerial ESP_BT;

int incoming;

void setup() {

  Serial.begin(115200);

  ESP_BT.begin("ESP32_LED_Control");

  Serial.println("Bluetooth Device is Ready to Pair");

  pinMode (12, OUTPUT);

  pinMode (13, OUTPUT);

  pinMode (27, OUTPUT);


}

void loop() {

  if (ESP_BT.available())
  {
    incoming = ESP_BT.read();

    Serial.print("Received:"); Serial.println(incoming);

    if (incoming == 49)
    {
      digitalWrite(13, HIGH);

      ESP_BT.println("GREEN LED ON");
    }

    if (incoming == 65)
    {
      digitalWrite(13, LOW);

      ESP_BT.println("GREEN LED OFF");
    }

    if (incoming == 50)
    {
      digitalWrite(12, HIGH);

      ESP_BT.println("YELLOW LED ON");
    }

    if (incoming == 66)
    {
      digitalWrite(12, LOW);

      ESP_BT.println("YELLOW LED OFF");
    }

    if (incoming == 51)
    {
      digitalWrite(27, HIGH);

      ESP_BT.println("RED LED ON");
    }

    if (incoming == 67)
    {
      digitalWrite(27, LOW);

      ESP_BT.println("RED LED OFF");
    }

    if (incoming == 57)
    {
      digitalWrite(13, HIGH);

      digitalWrite(12, HIGH);

      digitalWrite(27, HIGH);

      ESP_BT.println("ALL LED ON");
    }

    if (incoming == 73)
    {
      digitalWrite(13, LOW);

      digitalWrite(12, LOW);

      digitalWrite(27, LOW);

      ESP_BT.println("ALL LED OFF");
    }
  }
  delay(20);

}
3.4 ไปที่ Tools -> Board เลือก ESP32 Dev Module

3.6 ไปที่ Tools -> Port แล้วเลือกพอร์ตที่ปรากฏ (กรณีใช้เครื่องคอมพิวเตอร์ที่มี COM Port ให้เลือกตัวอื่นที่ไม่ใช่ COM1)
ในตัวอย่างเลือกเป็น "COM18"

3.7 กดปุ่ม
 เพื่ออัพโหลด
ตั้งชื่อไฟล์ -> Save โปรแกรม จะทำการ อัพโหลด


4.1 เปิดหน้าต่าง Serial Monitor โดยไปที่ Tools > Serial Monitor

4.2 มุมขวาล่าง ของ Serial Monitor เลือก 115200 baud คือ ตั้งค่าความเร็วในการรับ-ส่งข้อมูล คือ 115200

4.3 กดที่ปุ่ม EN 1 ครั้ง เพื่อเริ่มการทำงาน ของ ESP32

4.4 รอจนกระทั่งที่ Serial Monitor แสดง "Bluetooth Device is Ready to Pair" แสดงว่า Bluetooth ของ ESP 32 พร้อมทำงานแล้ว

4.5 ใช้ สมาร์ทโฟน Android เปิดการใช้งานบลูทูธ

4.6 เลือกจับคู่กับ ESP32_LED_Control

5. ดาวน์โหลด แอพ Bluetooth Control for Arduino
5.1 ใช้สมาร์ทโฟน ไปที่ Play store ค้นหา "Bluetooth Control for Arduino"

5.2 ติดตั้งเหมือนแอพ ทั่วๆไป
6. ทดสอบการทํางาน
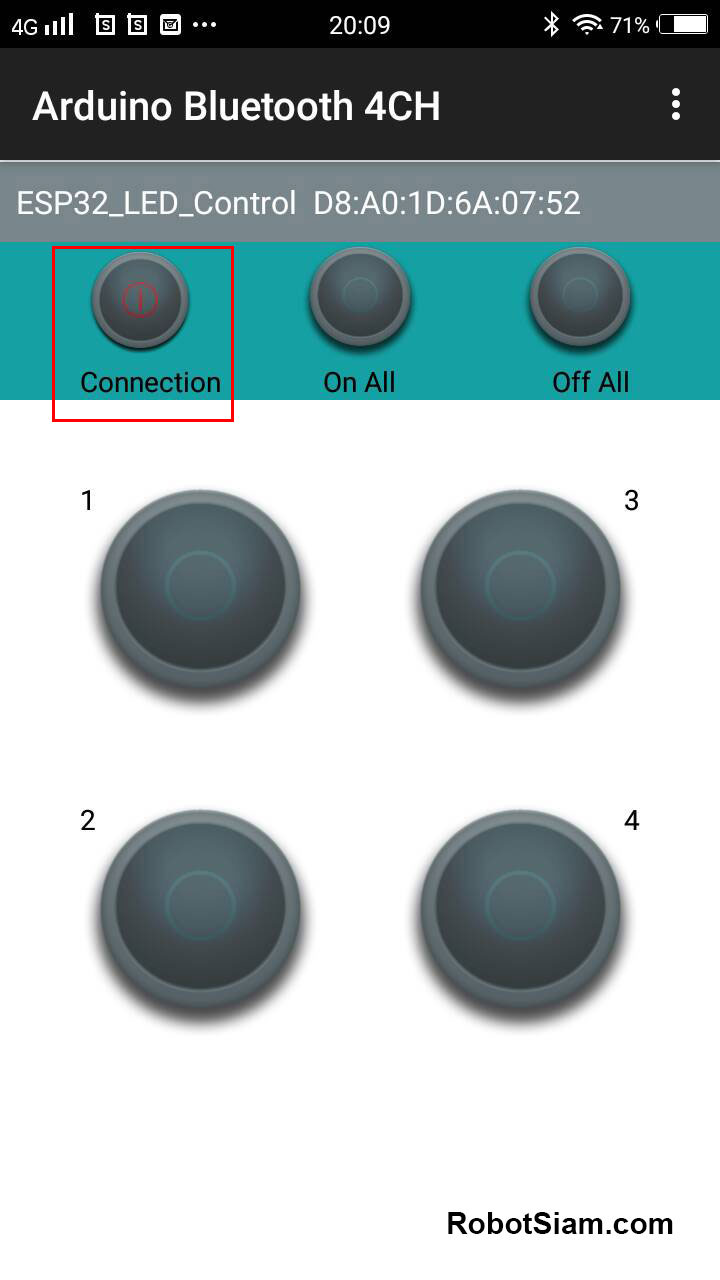
6.1 เปิดแอพ Bluetooth Control for Arduino

6.2 คลิกเลือก Connection

6.4 รอจนกระทั่งแสดงการเชื่อมต่อ กับ ESP32_LED_Control

6.4 รอจนกระทั่งแสดงการเชื่อมต่อ กับ ESP32_LED_Control

7. วีดีโอ ผลลัพล์การทำงาน
...
credit : https://circuitdigest.com/microcontroller-projects/using-classic-bluetooth-in-esp32-and-toogle-an-led
ไม่มีความคิดเห็น:
แสดงความคิดเห็น